Can You Fix a Cordless Drill by Yourself?
When it comes to cordless drills, it’s not uncommon to encounter issues such as battery draining quickly, drill not turning on, or poor performance. The question arises, can you fix a cordless drill by yourself? The answer is, yes, you can! In many cases, troubleshooting and repairing a cordless drill can be a do-it-yourself project. By following some simple steps and using the right tools, you can save time and money by fixing the drill yourself.
Understanding Cordless Drill Issues
Before diving into the process of fixing a cordless drill, it’s important to understand the common issues that can arise. Some of the most prevalent problems include battery and charging problems, motor and gear issues, and drill bit and chuck problems. These issues can affect the overall performance and functionality of the drill.
Troubleshooting and Repairing Cordless Drill Problems
When faced with a malfunctioning cordless drill, there are several steps you can take to troubleshoot and repair the problem:
Step 1: Battery and Charging Problems
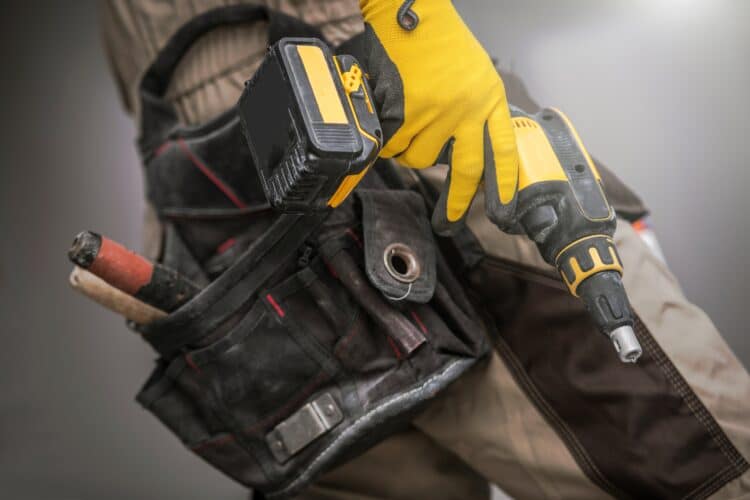
If your cordless drill is not holding a charge or the battery is draining quickly, the first step is to recharge the battery. If recharging doesn’t solve the problem, it may be necessary to replace the battery. Using genuine replacement batteries from the drill manufacturer or reputable suppliers is recommended.
Step 2: Motor and Gear Issues
If your drill lacks power or makes strange noises, it could indicate motor or gear problems. In such cases, inspecting and replacing worn-out parts like brushes and gears may be necessary. Lubricating or replacing the gears can also help resolve grinding sounds. It’s important to use the appropriate lubricating oil and follow the manufacturer’s guidelines.
Step 3: Drill Bit and Chuck Issues
If the chuck won’t tighten or loosen, or if the drill bit keeps falling out, the chuck may need to be replaced. It’s essential to use the right chuck for your drill model. Additionally, regularly cleaning the chuck and inspecting it for wear can help prevent issues.
Step 4: Regular Maintenance
Maintaining your cordless drill is crucial for its longevity and performance. Regularly cleaning air vents, inspecting the chuck, and applying lubricant to moving parts can help prevent issues from arising. Following the drill’s user manual for specific maintenance instructions is highly recommended.
Step 5: Seek Professional Help
While many cordless drill issues can be resolved through DIY troubleshooting and repairs, some problems may require professional assistance. Complex repairs or situations where you are unsure about the repair process should be left to experts. Seeking professional help ensures safety and prevents further damage to the drill.
Tips for Preventing Cordless Drill Issues
Prevention is always better than cure. To avoid common cordless drill problems, consider the following tips:
- Regularly clean and lubricate your drill to prevent dust and debris buildup, which can affect its performance.
- Use appropriate drill bits for different materials to avoid excessive wear and tear.
- Store your drill in a dry, dust-free environment to prevent moisture damage and corrosion.
Conclusion
Fixing a cordless drill by yourself is possible in many cases, with the right knowledge and tools. By understanding common issues, troubleshooting and repairing battery, motor, gear, and chuck problems, and performing regular maintenance, you can keep your cordless drill in excellent working condition. However, it’s important to seek professional help for complex repairs or when unsure about the repair process to ensure safety and prevent further damage. With proper care and maintenance, your cordless drill can serve you well for years to come.
Related Websites:
- Cordless Mag – Troubleshoot Issues with Your Cordless Drill
- Tool Trip – Common Cordless Drill Problems
- Cordless and Portables – How to Troubleshoot Common Issues with Cordless Power Drills
- Drill Guy – How to Repair Cordless Drill
- Shuntool – How to Repair an 18V Cordless Drill
- Tools Advisor – How to Take Apart a Makita Cordless Drill
- Shuntool – How to Repair Cordless Drill Not Working
FAQs:
Q: Can I fix a cordless drill by myself?
Yes, you can fix a cordless drill by yourself, depending on the issue. Assess your skill level, availability of necessary tools, and safety considerations before attempting any repairs. Our DIY repair tips can guide you through common cordless drill issues.
Q: What are the possible causes if my cordless drill is not turning on?
Several factors can cause a cordless drill to not turn on, such as a dead battery, faulty power switch, or motor issues. Troubleshooting steps, including checking the battery charge, inspecting the power switch, or seeking professional assistance, can help identify and resolve the problem.
Q: How can I replace or repair the battery of my cordless drill?
To replace or repair the battery of a cordless drill, follow our step-by-step guide. It involves safely removing the old battery, purchasing a compatible replacement, and installing it correctly. Remember to take necessary safety precautions, such as wearing protective gloves and ensuring the drill is turned off.
Q: When should I seek professional assistance for cordless drill repair?
It is recommended to seek professional assistance for cordless drill repair when dealing with complex issues beyond your DIY repair capabilities. Additionally, if your drill is still covered by the manufacturer’s warranty or there are authorized service centers, utilizing their expertise can ensure proper repairs. Consider the cost of professional repair in comparison to purchasing a new drill as well.
Q: What are the benefits of attempting DIY cordless drill repairs?
Attempting DIY cordless drill repairs can save you time and money. By fixing common issues yourself, you can avoid the inconvenience of waiting for professional repairs or the cost of purchasing a new drill. However, always approach DIY repairs cautiously, considering your skill level and safety precautions.


