If you use a lawnmower every week to keep your lawn looking like a smooth green carpet, it can be quite frustrating if the blade becomes rusty and refuses to cut through the grass evenly. Find out how you can detach and replace your lawnmower blade and what size socket you’ll need for the job:
Why Do You Need to Remove the Lawnmower Blade?
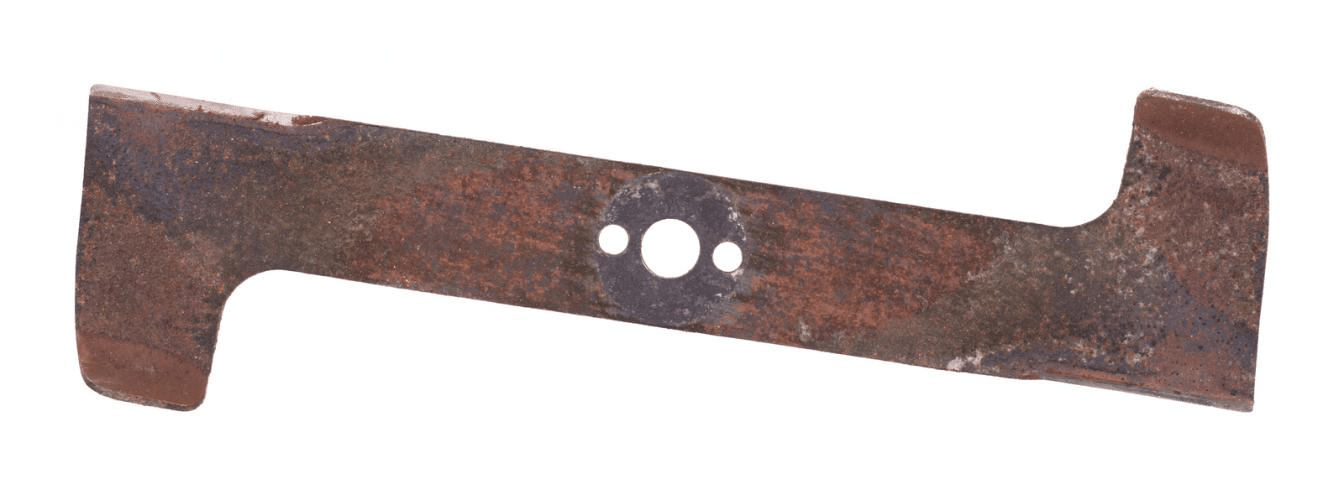
The need to remove and examine your blade arises when your lawnmower stops cutting the grass the way it used to. Whether you plan on sharpening the blade, trying to scrape the rust off it, or wish to replace it because it’s beyond repair, you need to switch off the motor and detach the blade before making any of these decisions.
In order to remove the lawnmower blade, you need to unscrew the bolts using a socket wrench. Now, this is where the important part comes in: what size socket is suitable for your lawnmower?
The Right Socket Size For Your Mower’s Blade
Different lawnmowers models have different bolt sizes. The standard sizes include 1/2 inch, 5/8 inch, and ¾ inch ones. You need to select your socket accordingly. A socket wrench that isn’t the right size will not move your bolt and is likely to get stuck.
Keep an Eye Out for Rust
Before you start unscrewing the bolts, check for signs of rust. If your bolts show visible rusting or you suspect that there might be some rust not visible to the eye, spray them with oil. Wait for around 10-15 minutes before trying to loosen them.
Measuring Socket Size for Bolts
Socket wrench sets contain different socket heads with different sizes. Different sizes can be used to tighten or remove different-sized nuts and bolts. The right-sized socket head needs to create enough leverage to completely surround the bolt.
Generally, socket heads either have a 6 or 12-point head to create enough friction between the wrench and bolt head to prevent it from slipping off. Here is the simplest way to measure the socket size needed for the bolts you have:
Step 1: Size-Gauging for the Right Socket Head
To gauge the size of the bolt, insert the bolt shank into the hole of the socket wrench. You’ll know what the right hole size is if there is a tiny bit of space to wiggle the wrench around, but not enough that it slips out.
Step 2: Check the Bolt Size
Check the user manual of your lawnmower to find out the size of the bolts on the model you have. If you’ve misplaced your manual or can’t seem to find the bolt size, you can try the following methods:
The bolt size will be printed on the side of the bolt. Bolt sizes may be according to the standard metric system or the American National Standards Institute (ANSI). If the brand follows the metric system, the sizes will be in millimeters (for instance ½, ¾mm, etc.).
You can also make use of an online size chart where you can insert the size of the bolt head and find the size of the right socket head to use with it.
Step 3: Ready to Start to Work
The socket heads will also be sized according to the metric system. Choose the socket head with the size corresponding with the one on your bolt head. The amount of space to move the socket should be minimal.
Once you have the right-sized socket head, you’re ready to get started on removing the blade.
Step 4: Twist Anti-Clockwise
The blades of a lawnmower rotate clockwise as you use it. When you’re trying to detach the blade, turn the bolts in the counter-clockwise direction to loosen them.
Removing the Lawnmower Blade
Now that you know the socket size for the lawnmower, the next step is to start working on removing the blade:
Follow the Necessary Safety Precautions
Wear thick work gloves before you get started to avoid accidentally cutting your hand on the blade.
Set the parking blade of the lawnmower in place and remove the ignition key. Remove the power source (whether it’s a battery-operated or plugged into a power outlet). This will ensure that the lawnmower doesn’t start up accidentally at any point.
Lift Up the Lawnmower
Use a car jack (or a large-sized log if you don’t have one) and prop the lawnmower upwards to access the blade below. Make sure the mower is secured in place to prevent disasters where it slips out of place and injures you.
Wedge piece of wood between the tires to prevent them from moving around.
Keep Track of the Original Positioning of the Blade
Either write down or better yet, click a picture of the original position of the blade so that you’re not confused when you’re reattaching the blade.
Remove the Bolts
The part we’ve all been waiting for- using the socket head we’ve worked so hard to find to unscrew the bolts securing the mower blade. Twist counter-clockwise and store the bolts safely to ensure that they don’t get lost.
Repair the Blade
Repair your blunt blade or replace it if it’s worn out. During this time, clean out the bottom of the lawnmower which may have bits of grass and debris stuck in it.
Return the Blade into Place
Open the picture you took and start working on returning the blade into its original place. This time, twist the socket wrench clockwise to tighten the bolts.
Almost Ready to Mow
Remove the wooden blocks from in between the wheels and lower the mower onto the ground. Check the fuel level in the mower in case a refill is required. Start the mower to see if it’s running properly. If it is, you’re ready to start mowing your lawn.
Keeping Your Lawn Summer-Ready
Your lawnmower should ideally be serviced at least once a year (or more if it isn’t working properly). To make this task quick and easy, and to ensure that your lawnmower doesn’t get damaged, make sure that you have the right socket size for the lawnmower blade.
With the right socket head, detaching and replacing your blade will be simple. It will keep your bolts intact which is extremely important, especially if you’re using the same bolts with the new blade you’re planning on installing.


