Tightening a nut can be tricky business. Angle your wrench the wrong way and it’ll get stuck. Drill a hole that’s too small and the nut will keep spinning. But it doesn’t have to be frustrating. Instead of having to try on multiple socket heads on your wrench, you can use an adjustable wrench (also known as a crescent wrench), which makes tightening or loosening a nut a quick and easy job.
What Does an Adjustable Wrench Look Like?
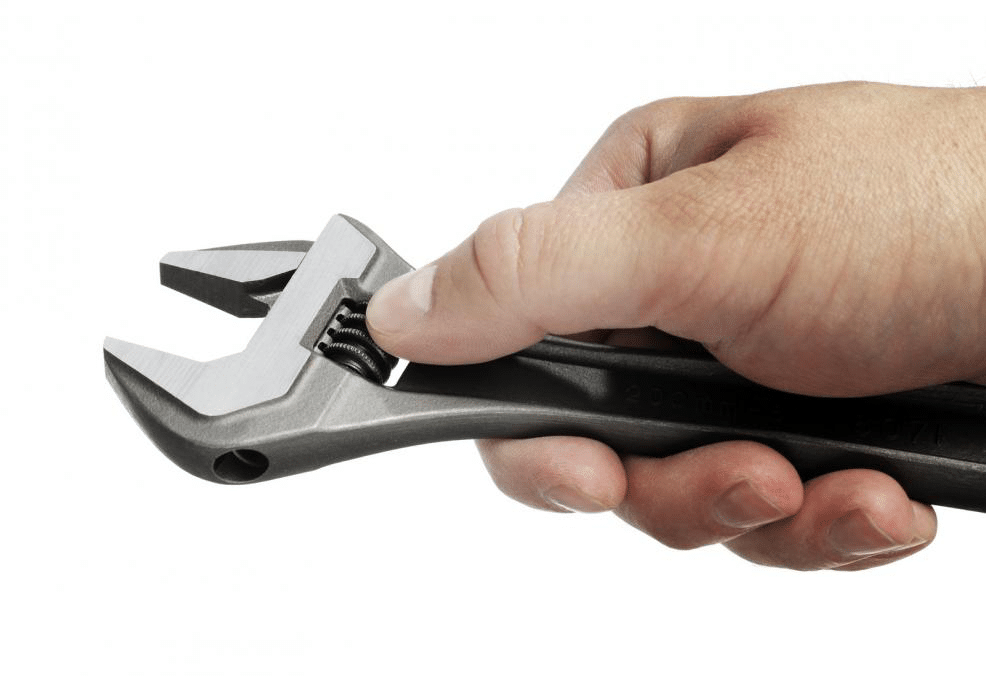
An adjustable wrench features a fixed and an adjustable jaw so that one side remains in place while the other one moves to accommodate different types of nuts. Both the jaws have a flat, smooth design and are ideal for use with hexagonal or square nuts.
The head of the wrench is at a 22.5-degree angle to the handle. This enables the handle to be flipped back and forth easily if you’re working in a small space and need to be able to control the wrench.
What Can An Adjustable Wrench Be Used For?
Regular wrenches can only be used on nuts that match the size of the socket head of the wrench. Adjustable wrenches can be used on nuts of nearly any size. They can be used for pretty much anything – from fixing a car tire to adjusting the brakes on your bike to fixing the sink’s garbage disposal.
How to Use an Adjustable Wrench
Step 1: Check the Nut Size
Whether you’re working on your bike or a pipe in the house, check the nut size before you begin trying to fit it in place. The nut size may be in standard or American units and will be printed on the side of the nut/bolt.
Step 2: Get Your Wrench into Position
Use the screw mechanism at the foot of the socket head and turn it to adjust the socket size. The jaws of the wrench will open slowly, and once you feel it’s sufficient to fit your nut head, try it for size. If you’ve opened it too much or too little, keep adjusting it till it fits.
The way to check if you’ve opened it to the right level is that the wrench should just fit over the nut with the tiniest bit of wiggle room.
Step 3: Fit the Wrench on the Nut
Slide the jaws of the wrench over the nut and hold it in place. Use the screw mechanism on the wrench to tighten the jaws of the wrench so that they stay firmly in place around the nut.
If the wrench keeps sliding around, it means you haven’t adjusted it properly and you need to revisit step 2 before moving forward.
Step 4: Start Tightening
If you’re tightening the nut, turn the wrench in a clockwise direction (anti-clockwise if you’re loosening it). Once it’s tight enough, stop turning the wrench to avoid splitting it or being stuck with a spinning nut/ bolt.
The movable jaw of the wrench will be on the left side when you’re tightening the nut. If you’re loosening the nut, the movable jaw will be on the right.
Step 5: Remove the Wrench
Use the screw mechanism to loosen the wrench and carefully remove it.
What to Be Careful About When Using an Adjustable Wrench
Even though both the jaws of the wrench experience some amount of pressure as you work, adjustable wrenches are designed in such a way that the fixed jaw is meant to handle the majority of the pressure. Applying too much force on the movable jaw may cause it to break or may damage the screw mechanism of the wrench.
When you’re tightening a nut with the adjustable wrench, the movable jaw should be on the side to which you will be rotating the wrench. This will put the pressure on the fixed jaw.
When you’re working with an adjustable wrench, make sure that the jaws of the wrench head are parallel to the surface/object you are working on. If you hold the wrench head at an angle to the nut, you won’t be able to get a proper grip, and the nut will either not be secured into place, or it will keep spinning or it will get stuck at an angle in the hole, which will make it difficult to either pry it out or fix it into place.
If the amount of working space is limited and you have to flip the tool, the jaws of the wrench will be reversed. This will enable you to apply pressure on the movable jaw of the wrench. If this is the case, be very careful not to apply too much pressure or you risk breaking the wrench.
The Knuckle-Buster
Whenever you work with an adjustable wrench, make sure not to place your knuckles directly on top of the wrench as you turn. This can damage your knuckles, especially if the wrench slips.
In fact, the crescent wrench is famously known as a knuckle-buster for this very reason. Maintain a tight grip over the wrench and don’t place your knuckles on top of the wrench, and you’ll be able to avoid any serious injuries.
When an Adjustable Wrench Should Not Be Used
There are certain jobs where an adjustable wrench just isn’t strong enough. If you’re working with something large and heavy, it is advisable to use a regular wrench, which will tighten the nut so that it doesn’t budge.
If you try using an adjustable wrench for heavy-duty tasks, you may either split a bolt so that it keeps spinning in place (and gets on your nerves) or you may injure yourself due to the extra force being exerted on your knuckles.
Adjustable wrenches are also not ideal if you’re dealing with completely round bolts since the jaws are designed to handle bolts that are either square or hexagonal in shape.
Endnote
Tightening a nut becomes a quick, clean job with the help of the adjustable wrench. It saves you the trouble of looking for the right-sized socket head for the wrench, and if it starts slipping, you can adjust it on the spot with the help of the easy-to-use screw mechanism.
Whether you’re a professional handyman or a DIY-er, having an adjustable wrench in your toolbox is essential. In fact, most professionals recommend having both a small and a large crescent wrench so that they can be used on any sized nut.


