Nail guns are a great tool to keep in your toolbox. Whether you’re a serious crafter or just need to fix some loose tiles on the roof, a nail gun will help you get the job done.
There are different nail guns that you can work with, but pneumatic nail guns are the best option: they use air pressure to drive nails into the surface, and apart from a little extra noise, they’re durable.
Pneumatic nail guns are powered by an air compressor and if you have no clue how to make the two work together, read this guide so that your task takes less than half the usual time and energy.
Using a Nail Gun with an Air Compressor
Before you get started, you’ll need a nail gun, an air hose, and an air compressor.
Step 1: Select the Type of Nail Gun to Use
The type of nail gun you work with depends on what you’re doing:
Finish Nail Gun
Finish nail guns use larger-sized nails (15-16 gauge) and are ideal for fixing old furniture or other DIY projects. They are suitable for use on wood and any other surface.
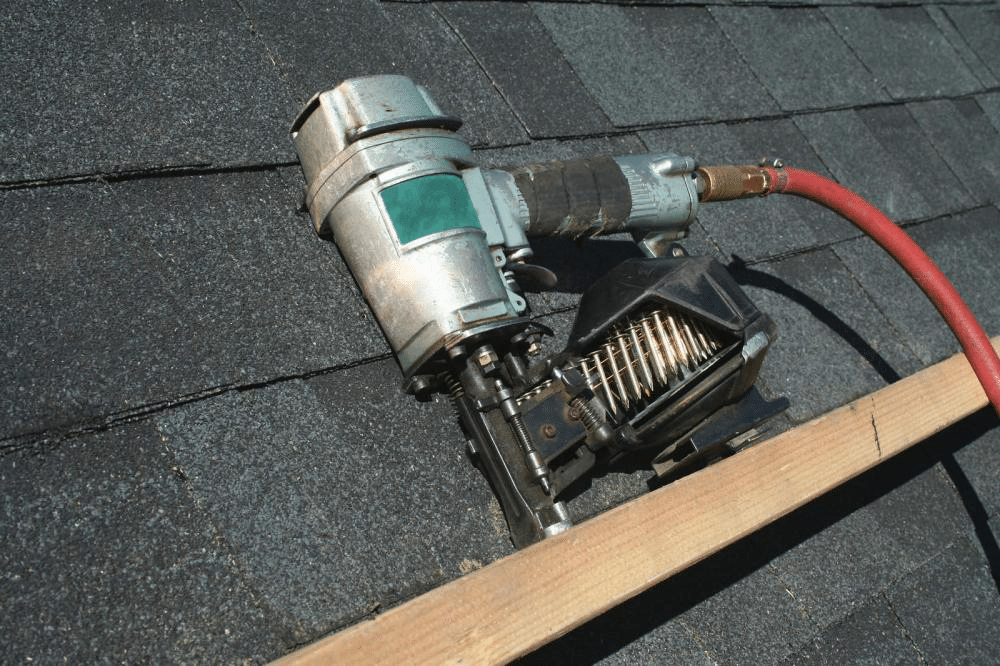
Framing Nail Gun
For bigger jobs, such as redoing your patio deck or reconstructing an old tool shed, a framing nail gun is ideal. It uses 2.8mm nails, which can be used on wood without splitting it or damaging the plaster on top.
Brad Nail Gun
Brad nail guns use smaller nails (18-23 gauge) and are suitable for work on small items, such as fixing a nightstand or a child’s toy because the screw heads are not too big and obvious.
Step 2: Select Nails for Your Nail Gun (Nailer)
Nails for nail guns are usually connected with plastic, paper, wires or a little adhesive. When you fire, the heat from the gun separates the nail and drives it into the surface. Nails that have adhesive secure better to the surface once the adhesive cools down and sets.
Most DIY and other home jobs require round-headed or D-shape (clipped nails). The main difference between the two is that a nail gun can hold 20-30% more clipped nails because of their design as opposed to round-headed nails.
Another difference is that clipped nails are usually paper-bound, whereas round nails are connected with plastic. The decision is based on personal preference and what type of nails you can find in your region.
Step 3: Choose Your Compressor
Compressors may be electric or gas-powered. Electric compressors are preferred for home use since they don’t emit gases and fumes.
Compressors may be portable or powered through cables. Again, it depends on what sort of jobs you’re going to use it for. If you’re attaching it to a nail gun, either option is fine, but if you rely on the same compressor to refill a flat tire, a portable one is better.
Step 4: Connect Your Air Compressor to Your Nail Gun
If you’ve gotten a brand new air compressor, you’ll need to put it together first. Use a pair of pliers to fix the rubber stopper and the wheels into place. After you’ve fastened the coupler into place, fix the nail gun on the open end of the air hose. Once the two are connected, the connecting wire should feel full and rigid. Fill the compressor with the required amount of oil and you’re ready to start.
Step 5: Safety First
Before you start working, put on a pair of safety goggles and preferably also a hard hat to protect yourself from any flying dust particles or injuries due to mismanaged equipment.
Never make any adjustments or attempt to clean your nail gun immediately after/ while using it.
Don’t work with a nail gun connected to an air compressor in an environment, which may produce electric sparks.
Step 6: Start Working
Turn your air compressor on and wait for the air pressure to build up in the tank. The average range of pressure for a personal-use air compressor is around 100-110 psi. Regulate the pressure based on how deep you want to drive the nails in. For completely sunken nails, you’ll need a higher psi than if you just want to fix the nails in place. Be careful not to drive the compressor past the pressure limit.
Press the nozzle of the nail gun completely against the surface and fire to drive the nail in. This is to avoid situations where nails may ricochet off the surface and injure you.
Step 7: Finishing Off
The nail gun is the last item you’ll disconnect. Till the air compressor hasn’t completely switched off, treat the nail gun as if it’s loaded, even if it is not.
Once you’re done, don’t turn the compressor off immediately. Slowly reduce the pressure by turning the regulator down. Once you’ve reached the end, switch it off and open the safety valve to release any remaining air. Open the drain valve of the compressor to release any remaining air from there as well (this will prevent rust buildup inside).
Detach the nail gun from air hose and clean the nail gun with some lubricant. Once both tools have cooled off completely, you can store them.
Safety Measure to Consider While Working
If at any point, the gun feels jammed, switch off the air compressor and nail gun completely before checking for jammed nails.
If you feel like the nails you’re using aren’t right for the job, stop, re-evaluate and change the nails if necessary.
Use work lights to avoid any mishaps due to darkness. Of course, it goes without saying that you should never point your nail gun at any person, animal or any part of your body. Keep out a warning sign while you work if you have to.
Be Your Own Handyman
Once you figure out how to use an air compressor with your nail gun, pretty much any task will become easier. If it’s something simple like fixing two boards that have come loose on your wooden floor, you don’t need to call a professional. Just power up your nail gun and fix it yourself. Even tasks such as building a treehouse for your kids won’t require too much time or energy. The air compressor will do the job of driving the nails in for you.


